Preface
Spectator View Pro involves the following four components:
- An application built specifically to enable spectator view, which is based on shared experiences in mixed reality
- A user wearing HoloLens using the application.
- A spectator view camera rig providing a third-person perspective video.
- A desktop PC running the shared experience app and compositing the holograms into a spectator view video.
How does it all come together?
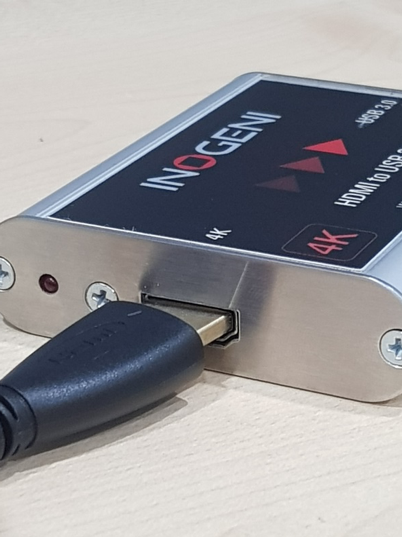
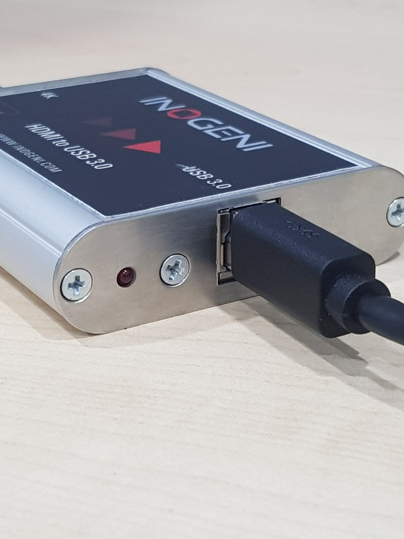
The dedicated Spectator View HoloLens mounted on the Camera rig sends its relative location in virtual space (to the other connected HoloLens) to the computer. Live video feed from the Camera is also similarly streamed to the computer via a special HDMI to USB adapter which allows the computer to receive HDMI streams as Camera input.
The custom application (built with Spectator View support) is played on the computer on the Unity Editor will superimpose the app holograms on to the live video feed via the use of a special plugin that is added to the Unity Editor itself. This allows other people to view the holograms on a 2D screen.
There are some preparations to be done and its usually advised that the setup is done about 20 — 30 minutes ahead of the showing. Part of the preparation includes calibrating the HoloLens to the focal view of the camera, setting up the Unity Editor itself and the physical setup of the Spectator View camera rig.
Minimum Desktop/Laptop Specifications
- As per Unity Website: https://unity3d.com/unity/system-requirements
Specifications:
- OS: Windows 7 SP1+, macOS 10.12+, Ubuntu 16.04+
- Graphics card with DX10 (shader model 4.0) capabilities.
- CPU: SSE2 instruction set support.
Showcase Equipment Checklist
- Hardware
- 3 * HoloLens Charger/Cable Set (Depending on showcase size)
- Long Table approx. 1m by 3m depending on showcase (for anchoring the experience)
- Software
- Experience Appx Bundle (With supporting Framework Packages)
- Unity
- Visual Studio 2017 with UWP Workload
Spectator View Rig Equipment
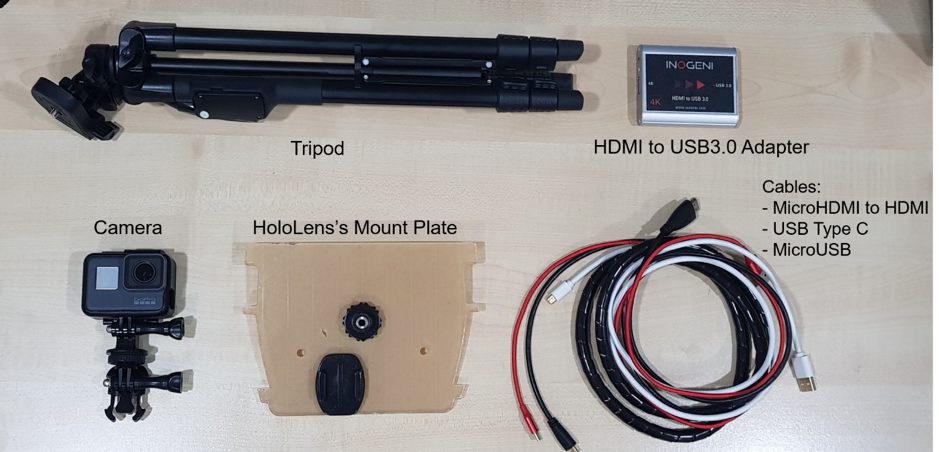
- Tripod
- HoloLens’s Mount Plate
- Camera with HDMI out capabilities
- CamLink HDMI to USB3.0 Device / HDMI Input to USB 3.0 Card
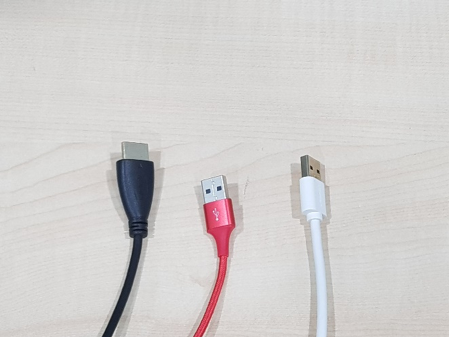
- Cables
- MicroHDMI to HDMI
- USB Type C
- MicroUSB (For Charging the Spectator View HoloLens)
- 1 * Laptop/Desktop (Refer to Minimum Desktop/Laptop Specifications)
- 5 GHz capable Wireless Router (For local networking)
Spectator View Rig Setup
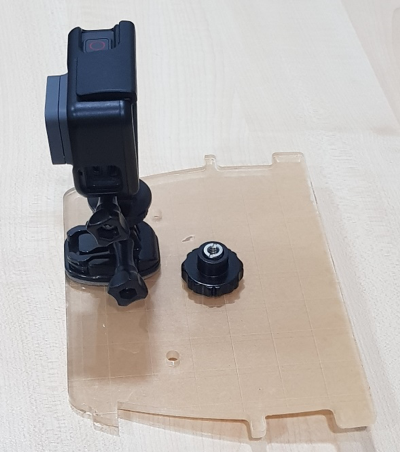
1. Install the Camera on the HoloLen’s Mount Plate
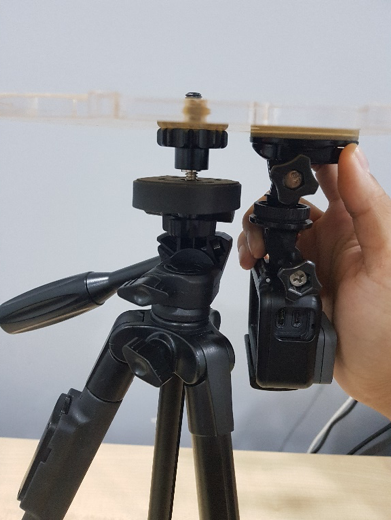
2. Screw the Mount Plate with Camera onto the Tripod
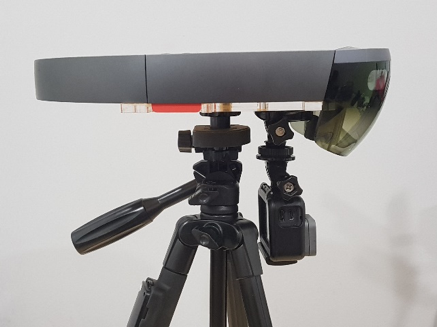
3. Place Spectator View HoloLens on Mount Plate, ensure the speakers are seated firmly in the Mount Plate Indents
4. Connect all cables to the Spectator View Rig
- MicroHDMI to HDMI cable, to the Camera
- USB Type C cable, to Camera
- MicroUSB cable to HoloLens
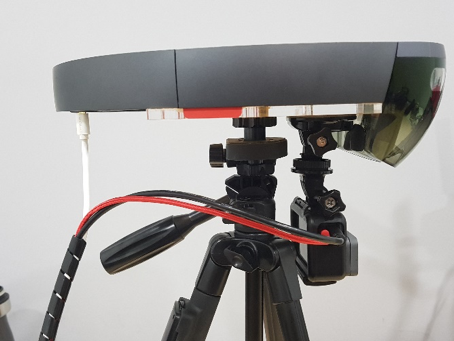
5. Connect the cable ends
Spectator View Setup Flow
1. Setup of Wireless Network
- a. Power on Wireless Router
- b. Wait for Router to boot
- c. Verify that Wireless Network is now detectable (Using your own mobile phone/laptop to check)
2. Setup of HoloLens Hardware
- a. Power on HoloLens
- b. Go to Settings > Holograms > Clear Nearby Holograms
- c. Proceed to Setup of HoloLens Networked Experience
3. Setup of HoloLens Networked Experience
- a. Navigate to the App
- b. In the App, at the Join Screen
- c. To setup Server HoloLens, click Start.
- d. To setup the Client HoloLens, Highlight the existing Server Entry in the list, by air tapping. Then air tap the Join Button.
4. Setup of Spectator View Hardware
- a. Power on laptop
- b. Connect to Shared Wireless Network
- c. Open Unity Editor
- i. Open Experience App
- ii. Enter in Server IP and Spectator View Client IP
- iii. Ensure Auto-Connect is Checked
- iv. Open Compositor
- v. Press Play
- vi. Ensure Video Feed and holograms are showing in the Compositor
Additional things to note
- After demonstration, the HoloLens must be charged with the Original Charger. Using other chargers with less than a 2.5A current will not provide enough power and thus result in a gradual loss of charge on the HoloLens over time.
- There is no need to put the HoloLens to sleep after the demonstration. They can be kept on but must be facing the anchored experience to prevent loss of spatial mapping.
- Connect the laptop to the network via an Ethernet cable instead of Wi-Fi for stability.